
Insulation is the most important home design feature you’ll never see. The right choices will make sure your house is comfortable, your energy bills are low and your water-sensitive materials are protected from moisture. There is an ever-expanding buffet of types of insulation and everyone has their own names and opinions about each. Here’s a primer on what is what, and what goes where:
Fiberglass Batts
The fluffy pink stuff you are probably familiar with, which remains the low-cost go-to for basic thermal comfort. Found in stretch-wrapped plastic packaging often featuring the Pink Panther, fiberglass batt insulation comes in rolls designed to shove or lay into the space between your studs or joists. Some come with a paper backing with flaps to staple to the stud for support. The paper backing was once touted as a vapor retarding feature, however, lots of ambiguity with what that means along with geographic uncertainty as to which side of the wall should have vapor retarding properties to avoid condensation issues. In reality, it didn't do much either way as a barrier, but if you can, get the unfaced stuff in New Orleans.
Mineral Wool Batts
Like fiberglass, these come in rolls designed to stuff between the studs. Unlike fiberglass, it doesn't burn, it provides additional thermal resistance (R-value) per inch and has superior acoustic properties for a slight upcharge in price. Rockwool (formerly Roxul) was first to introduce this product into the market, but most of the fiberglass manufacturers offer a similar option.
Rigid Insulation Board
Foam panels, which generally come in three flavors:
white puffy compressed globes (EPS)
bright color - pink or blue - board (XPS), and
the creamy colored board with the foil-facing. (Polyiso)
They all have slightly different properties but the main thing is that they are all meant to be attached OUTSIDE your main structural enclosure. The bonus of this is they run uninterrupted by studs and pipes and outlets and all the other stuff you have in your wall that is NOT insulation. You can also walk on some of them making them good choices for flat roofs. They are generally associated with commercial construction, though that is starting to change. They are a great choice for building new, since a new building can be designed around a completely different insulation concept. You may encounter raised costs due to them being a less familiar install for some homebuilders and laborers. For existing houses, unless you're ripping the entire thing down to its skeleton, they are tough to justify, unless you’re looking for floor insulation under a raised structure.
Blown-in
The piles of fluff with no real structure, great for retrofits because, being made out of tiny pieces, they can be used to fill up any size space from a relatively small insertion points. Piles of this stuff usually sits above ceilings but can fill in wall cavities, and there are even netted products that allow it to hug sloping roof rafters. You can make your fluffy stuff out of lots of things: fiberglass, mineral wool, old newspaper and blue jeans.
Spray Foam
Polyurethane spray foam is an increasingly popular choice for both new construction and retrofits because in addition to providing resistance to heat transfer, it also acts as an air seal. Where batts and blown-in allow air in and around their voids and installation gaps, which get worse over time due to sagging and settling, spray foam stays put, and doesn't allow any air at all to trespass through its depth which helps a lot with the interior air temperature. Also its thermal resistance per inch is at worst on par with batts and can be many times higher, depending on the product, which comes in two flavors, both of which are a bit environmentally dubious in terms of nasty chemicals involved:
Open cell - this type is cheaper, about as effective or slightly better per inch as batts at resisting heat transfer, and is impermeable to air.
Closed cell - more expensive, but has added bonuses: much more resistive to heat per inch, which makes it good for tight spaces like cathedral ceilings, impenetrable by moisture of any kind, and it strength when dry actually adds to the building's strength.
If you're looking to be cutting edge, you'll of course pay a premium, but there are options beyond the more commonly available methods listed above. Wood studs have been developed that actually have foam in the center, like an ice cream sandwich, that removes the problem of wood studs conducting heat past your insulation layer. There is even a rigid product that is actually made of mushrooms engineered to grow into a foam-like material that has great insulating properties.
There's many options in the fight to achieve thermal comfort while reducing our energy use, and it's important to know what's best for your particular situation as early as possible so that your project feels as good as it looks.
A Visual Guide to Selecting Your Exterior Color Scheme
Ben and I are in the process of renovating our house in New Orleans, and I can’t help but think about the exterior color scheme. Everywhere you look in this eccentric city, there are colorful buildings and homes painted with bright hues, pastel monochromatics, and neutral shades. The color palette of the architecture here creates unique city blocks that are backdrops for urban photoshoots, and takes us on a colorful, rhythmic ride. With so many examples to look at, why am I having such a hard time making this selection??
“The color palette of the architecture here creates unique city blocks that are backdrops for urban photoshoots, and takes us on a colorful, rhythmic ride. ”
I love color. I have a whole Pinterest Board dedicated to it. I give as much importance to color and materiality as I do to architecture because thoughtful color adds so much. It demonstrates values. It expresses ideas and emotions. Color enriches our perception of space, the same way light and form do. I will touch lightly on the basics of color theory and then jump right into how I put together my exterior color scheme.
Color Basics
Who here has heard of the Color Wheel? I hope you ALL raised your hand. The color wheel represents the presence of light waves in color, each with a unique wavelength, as evidenced by the most magical example, the rainbow.
The Primary, Second and Tertiary colors might be the first box of crayons you ever received, making you an expert in the color wheel! But what about tint and shade? What are those?
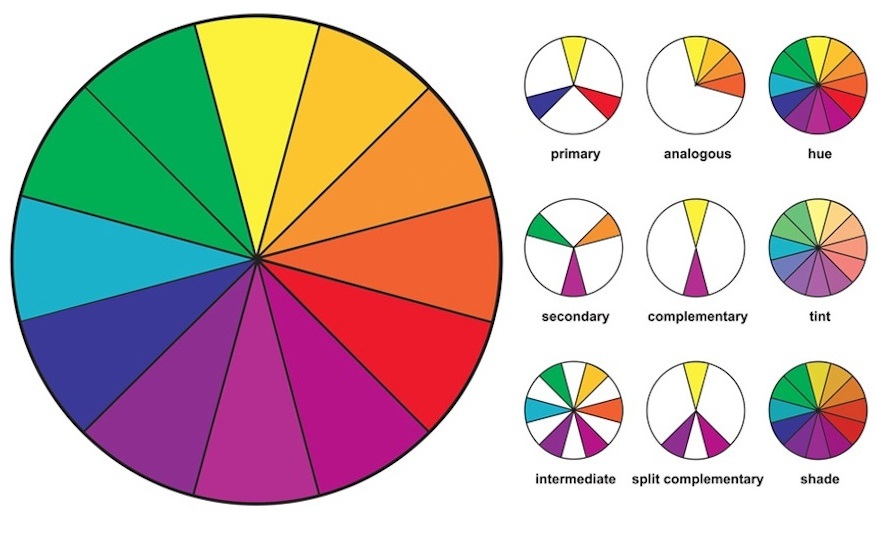
Image Via: University of Makeup

Tint: The act of lightening a color by adding white to it.
Shade: The act of darkening a color by adding black.
Tone: Slightly darkening a color by adding gray.
Saturation: The highest level of pigmentation, no change with black, white or gray.
Value: Variation in light and dark.
Color Combinations
Color combinations, or as a designer may say, color palettes or color schemes, are any combination of colors. These combinations can change the mood or tone of anything you are trying to represent from logo design to architecture.
Combinations with less contrast create a mood of restraint, subtlety, discreetness and understatement.
Combinations with more contrast create a mood of drama, excitement and conflict.
In planning a color scheme, contrast is not just created by changing the entire color, but by using the same or similar colors with different values and saturations.
Color Palette Selection
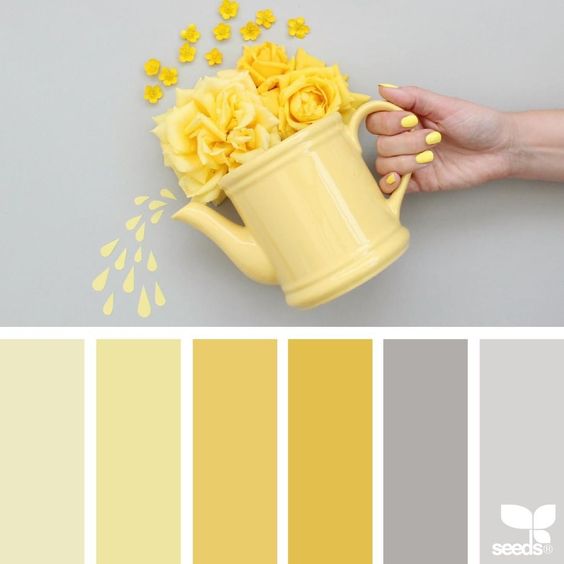
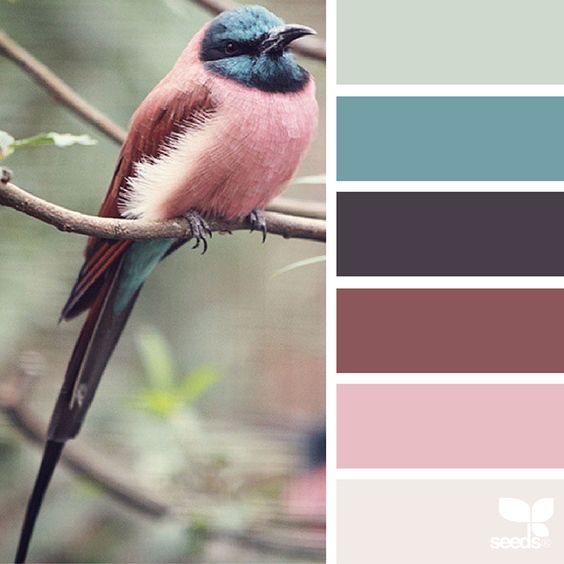
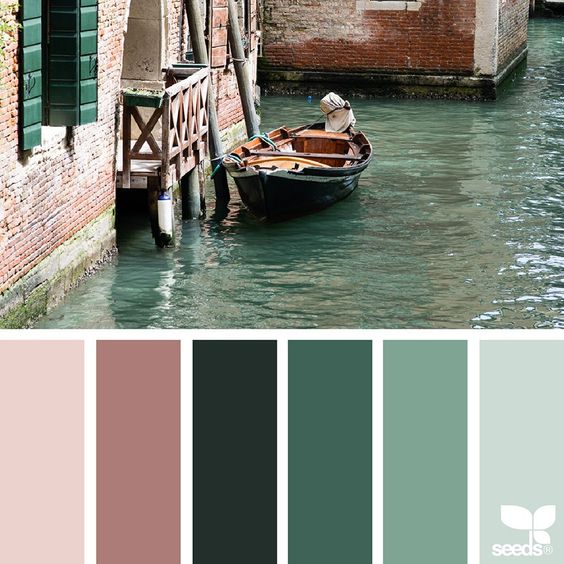
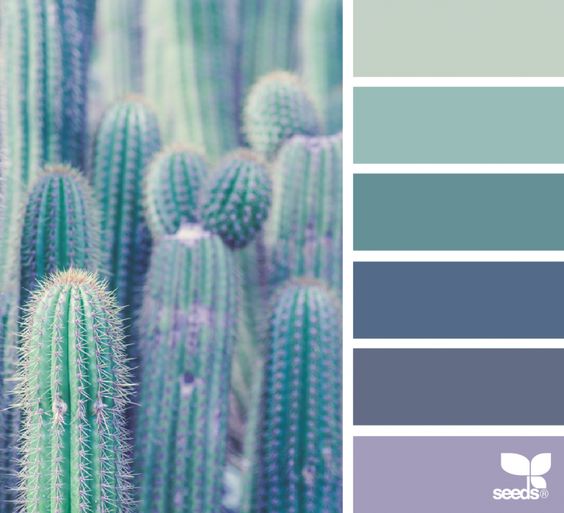
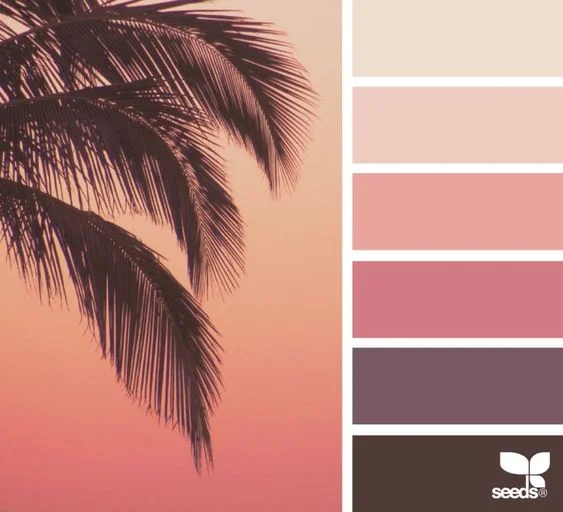
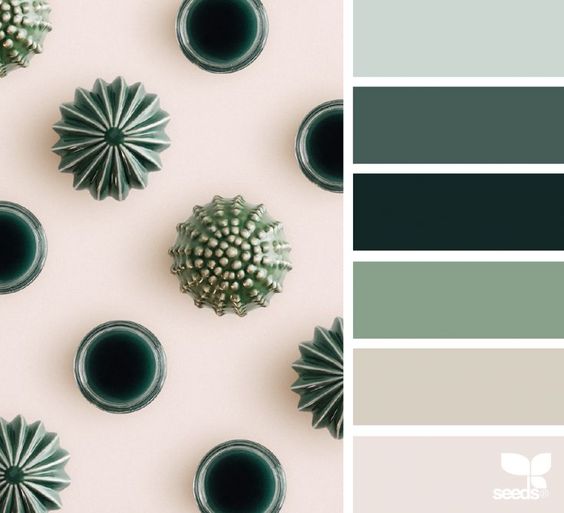
Some of my favorite color palettes are created by design-seeds.com. I found the below images on Pinterest by just searching for the term ‘color palettes.’ Here you can get palettes already generated for you, but if you are interested in exploring your own combinations of color, read more below.

Guide to an Exterior Color Scheme (New Orleans Edition):
I would stick to selecting 3 to 4 colors at most. Proper proportions are important. One color must be the dominant color, there must be a subordinate color and then an accent color or two. Think 50%, 30%, 15%, <5% ratio.
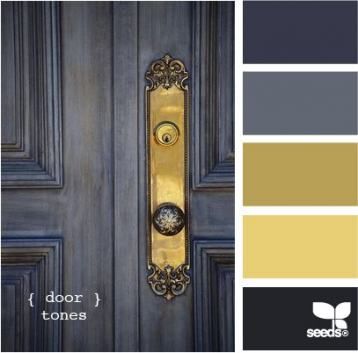
Below are some of my favorite examples of colorful New Orleans houses:
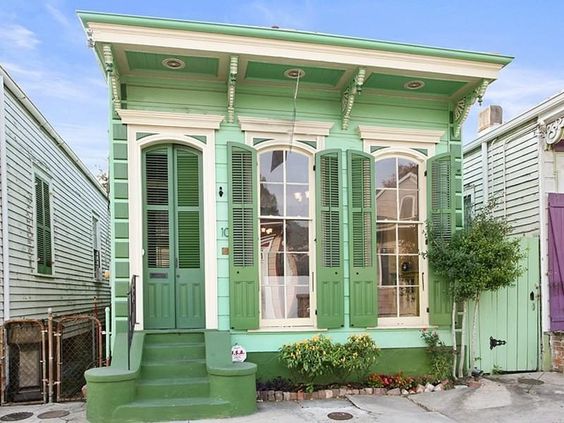
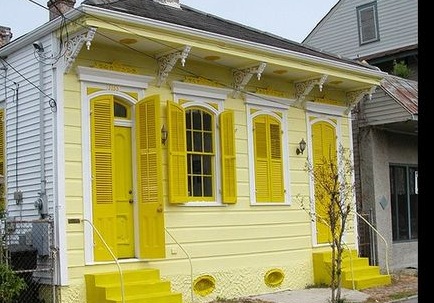
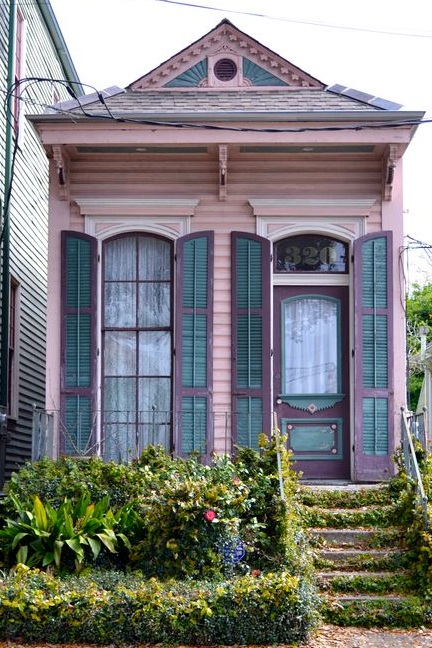
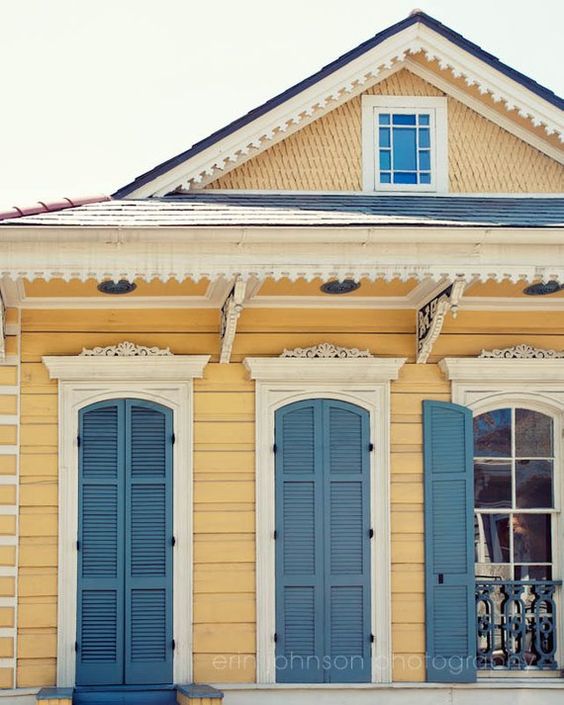

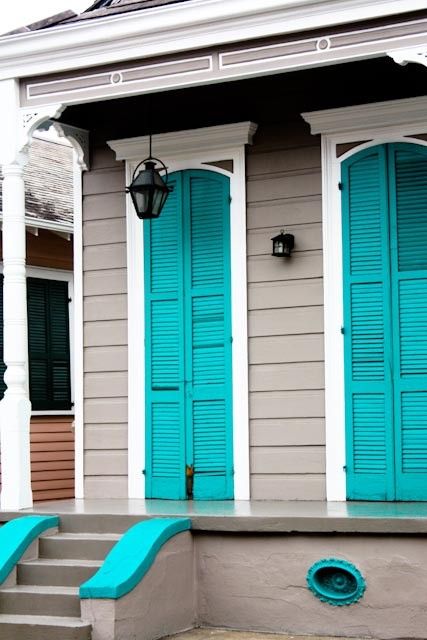


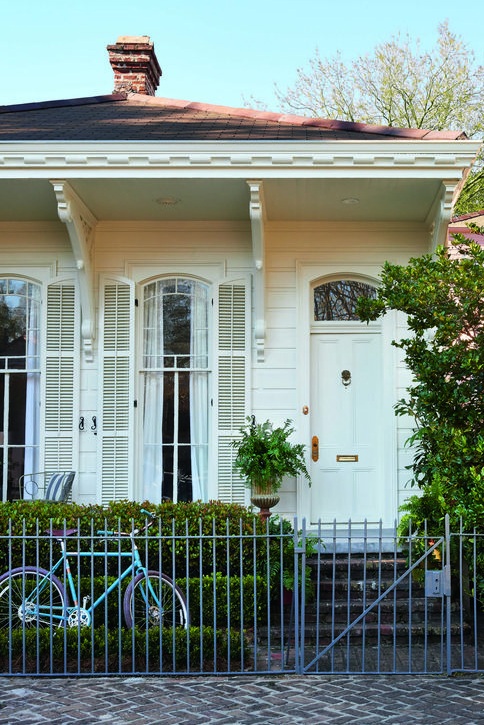
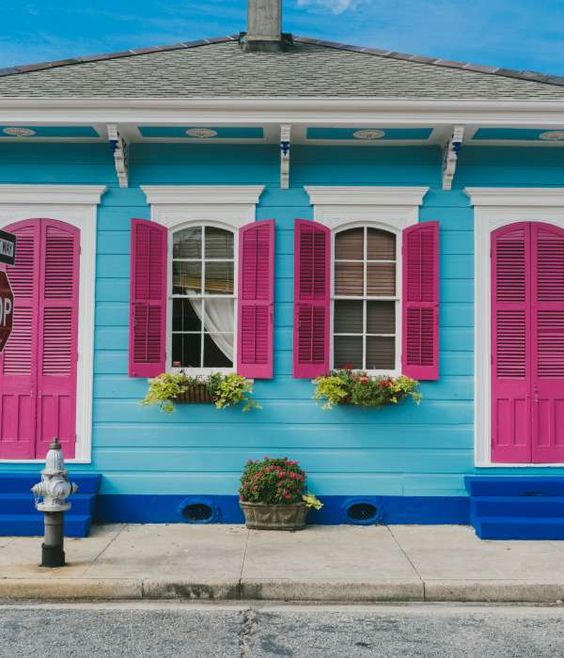
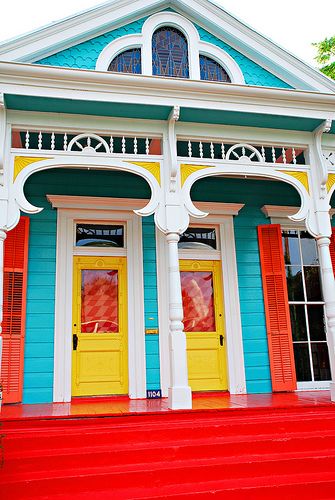
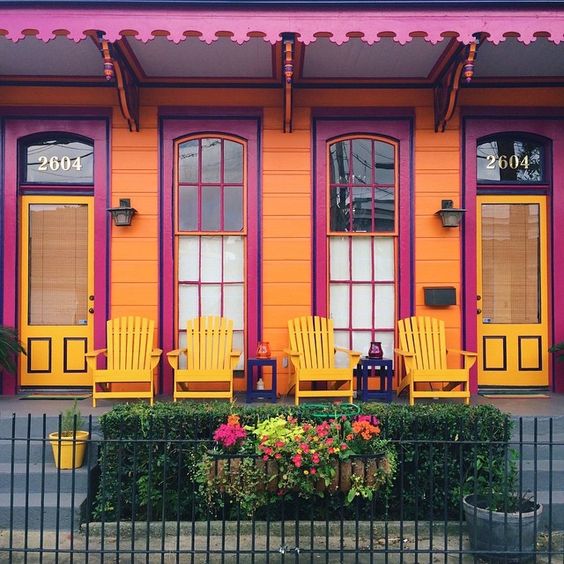
Top Row: Monochromatic, colors of varying tones, tints and shades
2nd Row: Complementary colors
3rd Row: Neutrals
Bottom Row: Vibrant, Bold colors
“I would stick to selecting 3 to 4 colors at most!”
What I know works:
For larger color combinations, select colors with varying levels of shades or tints. Your accent colors can be complementary colors. This helps your eyes find a place to rest.
When going with darker or deeper shades for siding, use white or vibrant colors to offset the dark color.
More than 4 colors almost always feels too busy. But hey, these are just my guidelines, not rules! The 4th color, the brightest/boldest color, should always be used sparingly, <5%. See: Front Door Colors above.
In Monochromatic schemes, use the darkest tone to emphasize detail for example, the shutters, doors and quoins, while the siding should be painted the lightest or most neutral of hues.
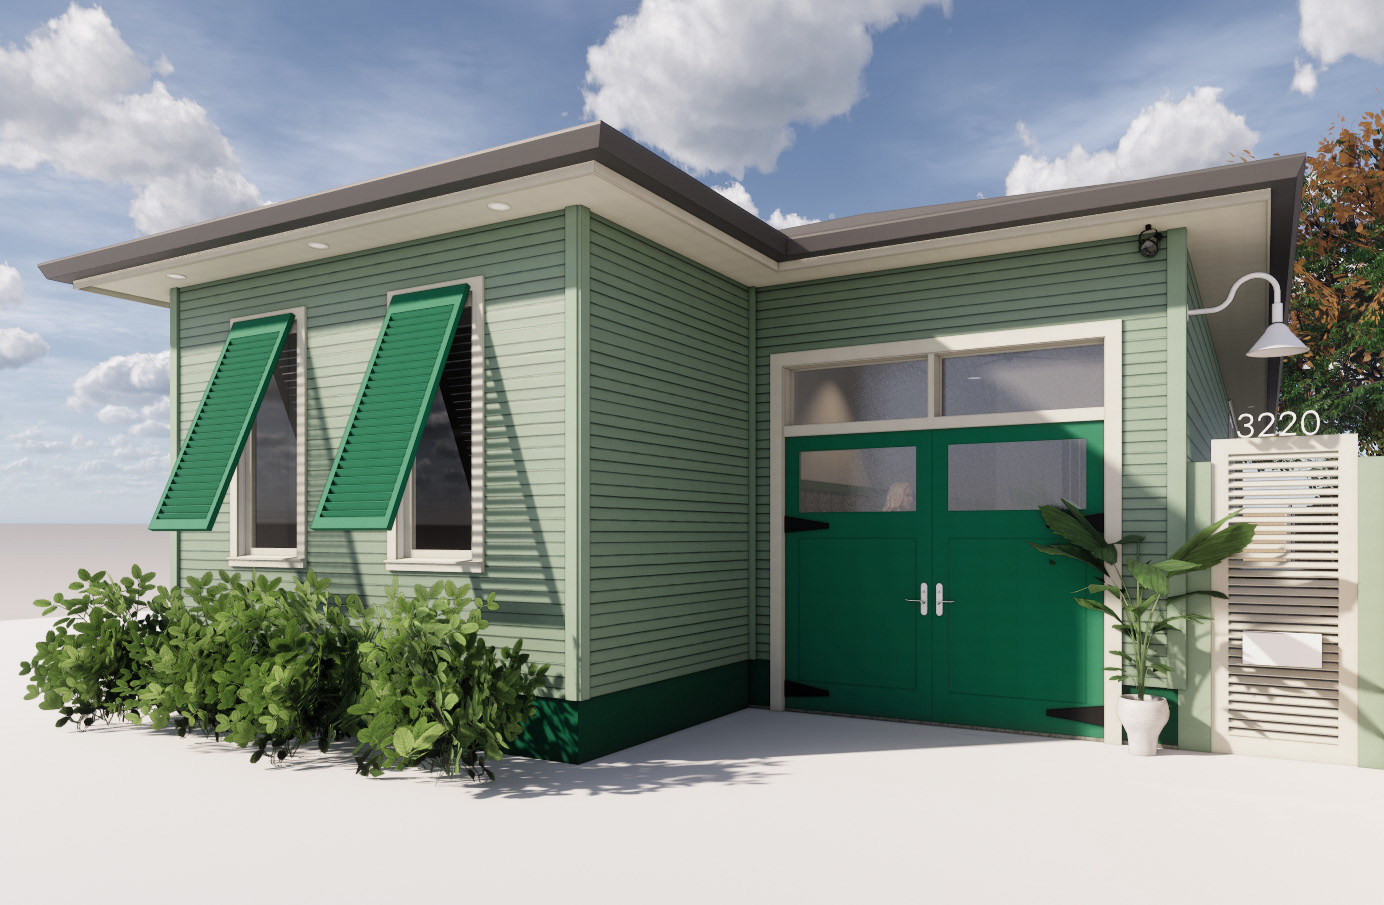
Color Combo Renderings
Below is a quick color study for our favorite residential project, our own house! We tried on a few of these principles - monochromatic with shifting values, neutrals with a vibrant color on important elements, and never more than 4 different colors. Check out our Instagram story to vote on your favorite scheme!


content source: The Complete Color Harmony, Pantone Edition by Leatrice Eiseman
Let us know what you think and stay up to date my subscribing to our newsletter!
Detail Hack- Medicine Cabinets

Not every project has the budget for custom medicine cabinets. In the projects above and below, we used partially recessed medicine cabinets that were purchased either at Ikea or other online shopping outlets
Read More
Questions For Your Architect: Should I GC my own house project?
Can you? Yes. Should you? No. Unless you work in the construction industry and are familiar with contracts and coordination, the perceived savings of going it alone tend to evaporate quickly. While an optimistic "do-it-yourself" attitude is admirable, be mindful that these professions exist out of necessity. Take a quick test and see if you can answer 'yes' to the following questions:
1. Do I have 10-20 hours a week to dedicate to meeting with sub-contractors on site?
2. Am I tenacious enough to communicate effectively with professionals when we disagree?
3. Can I make decisions quickly and confidently?
4. Am I a good planner who remains organized from the beginning to the end of a project?
If you scored a 100, welcome to the world of construction management!
If not, a contractor could help you to save money, even though you are paying him/her 15%-20% on top of construction costs, and also consider that the contractor is saving you an immense, lengthy headache. Financially it’s generally a wash, and mentally, you are saving your sanity, which certainly has value as well!

Clients often ask me: "Can I purchase all the materials to help save on overall costs?" The answer is also yes, but let me add my two cents here. You will save on overall costs because your purchase of materials will reduce the percentage that the contractor tacks on material and labor. However, the contractor can purchase material with his/her trade discount. So where you may spend $5,000 on hardwood flooring flying solo, the contractor may pay $4200, and charge ...let's say... $840 in overhead, for a total of $5040, so you have saved yourself $40. Is it worth it to have to measure and estimate square footage and overage, coordinate the delivery, open the boxes to acclimate the wood to the moisture content of the house, and make any other preparations recommended by the manufacturer? I think most people would answer "not really". If you would do these tasks for $40 because you enjoy it, it could be time for a career switch, and again, welcome to the world of construction management!

BUT! There are some materials we do encourage our clients to purchase on their own, but be sure to review the contract with suppliers and opt for warranties. Some of those items are:
- hardware
- decorative light fixtures
- wallpaper
- appliances
- plumbing fixtures
If you need help selecting these, our interiors studio can assist with selections and pricing.For more information about my company, Studio BKA, and the many ways we can help you with your project, please check out: www.studioBKA.com! If you have any questions you'd like to see answered in this series, send me an email at kim@studioBKA.com.
Detail Hacks- The Shower Niche
A friend recently sent me a picture of this niche (shown below) and asked how the edges are generally resolved. I thought our conversation would make for a great blog post series called "Detail Hacks" since not everyone building their dream home has years of experience as an architect or builder.
The shower niche is a great detail when executed properly but unless you are a designer, architect or builder, you may overlook a couple of small things that could change the overall appearance. I will give you a few solutions and you can decide which one looks appropriate in your house!

You probably didn't think about the raw edges of the tile when you were in the tile store trying to make a decision!
Solution 1: the Schluter strip
The addition of metal gives the bathroom a contemporary vibe. The Schluter strip is essentially a transition strip that captures the raw edge of the tile.

Solution 2: Finished edge or bullnose edge
Some tile offer finished or bullnose edges that give the niche a clean look. This detail is great for traditional or modern residential projects.

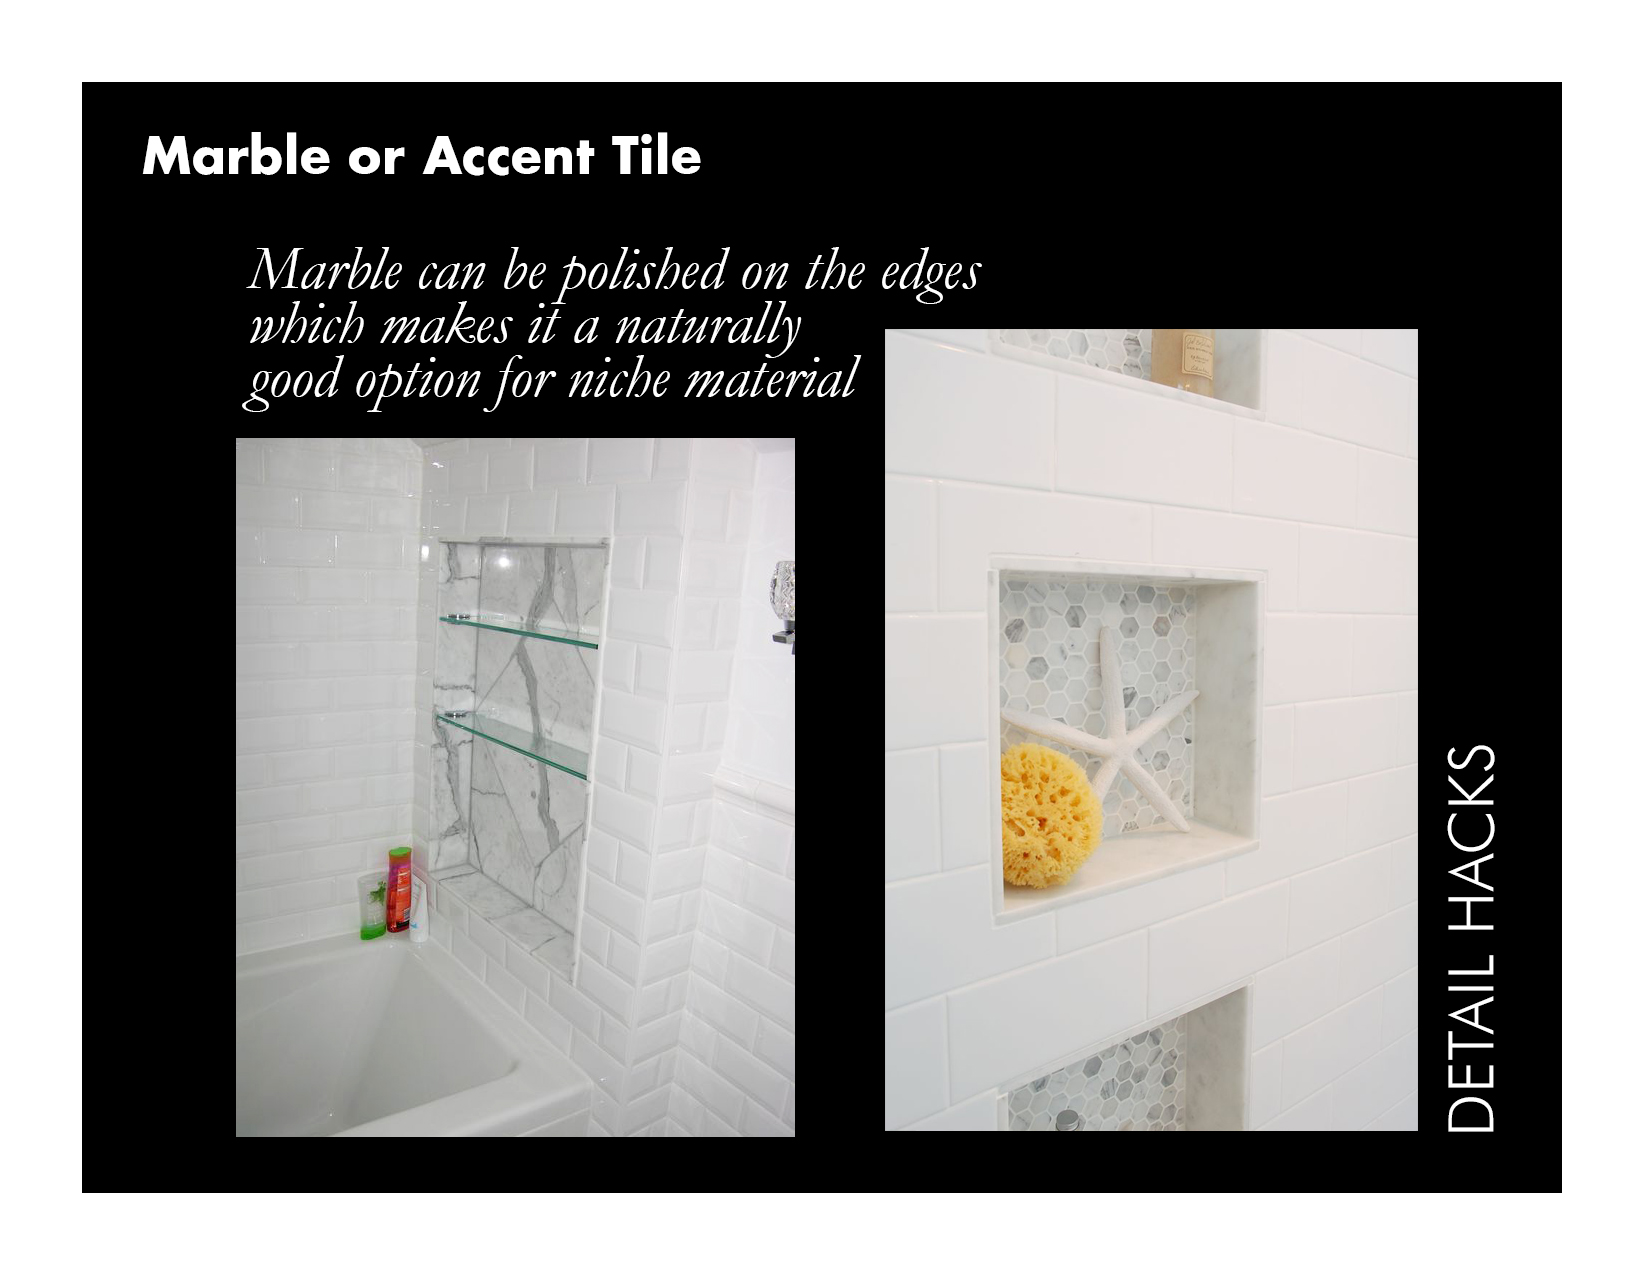
Solution 3: Marble
Let's pretend you selected a subway tile that doesn't offer finished or bullnose edges, what do you do now? One solution is to use marble or quartz as the inset material. It adds a nice contrast and its likely you have this material left over from the counter top fabrication.
There you have it! Three solution to finishing out your shower niche! Good Luck and don't forget to subscribe to our newsletter for more architecture inspiration!